In a recent post I introduced my WordPress travel map plugin, which I created to use it in a personal project of mine. Said project is a WordPress photo blog of all the places I have visited in recent years. For each place I have been to there is one post with my favorite photo. All the posts are then linked in the big travel map on the frontpage.
Since I had over 200 photos I wanted to upload creating the site could have taken quite a while if done manually. I would need to upload all photos and then create an individual post for each of them, enter the title, set the featured image and so on and so on.
That is why I automated the whole process and was able to create my photo blog in a single day!
You can go here to see the final result in action. In this post I will share how exactly I automated the photo blog creation and what tools I used. Hopefully that will save you some time if you are ever in a similar situation.
The New Tool I Did Not Use
 It is worth to note that just recently Automattic, the main company behind WordPress, have released their own web tool to help with the automatic upload of images to a photo blog. It is called Postbot and allows you to upload up to 50 photos and then schedule them to be posted to your blog.
Why did I not use Postbot? The main reason is that I wanted something that gave me more control over the process. The plugin I used instead and will show you below allowed me to easily change the look of the resulting photo posts, adding custom fields or modifying the date and title as needed (for which some coding knowledge is required however). Furthermore Postbot requires a WordPress.com account, which I did not have, and is limited to 50 photos per upload.
The Tools I Did Use
- Automatic Featured Image Posts – this great little plugin by Jeremy Felt is the one that did most of the magic. What it does is easy to explain: When you upload a new image to your WordPress media library a new post is automatically created with the photo set as featured image! So, if you upload 100 new photos and have this plugin activated you end up with 100 new posts, one for each photo. No need to create a post for each image yourself!
- Simple Travel Map – This plugin I created myself to show a map in which all my photo posts are marked. It is not necessary for creating the photo blog, unless you want a map as well, but listed here since it played a part in my creation process outlined below.
- Magnifique by cssigniter is the theme I used (slightly modified) because I liked its simplicity. In general you can choose any theme but should make sure that it prominently displays the featured image in its full size (most photography themes will do that), since that is what the automatic photo upload will rely on.
- I have also used Infinite Scroll to load new photos when scrolling down automatically. This is entirely optional but I thought it worked nicely on a photo blog.
Create The Photo Blog In 2 Steps
1. Prepare All Photos
This is actually the most time consuming step already. Not only did I have to choose and collect all photos in one place, I also had to rename each image file. Why rename? Because the “Automatic Featured Image Posts” plugin uses the filename as title of the automatic photo posts, so it is kind of important.
I used the location of the photo as filename and thus as post title. This was in part because I also wanted to make use of the title to tag each photo in my travel map. If you don’t want to use the map like I did you can choose anything you want as the filenames (and thus as post titles in your photo blog).

2. Upload The Photos
First of all, install the “Automatic Featured Image Posts” plugin I linked to above. Since it is hosted in the official WP plugin directory you can do so directly from your WordPress admin area. Afterwards check the new settings page, where you can change the post status and type of the generated posts if you so desire.
After that the rest is a piece of cake.
(Note: If you want to create a map of your photos automatically like I did there is one more step. Have a look at the last paragraph first!)
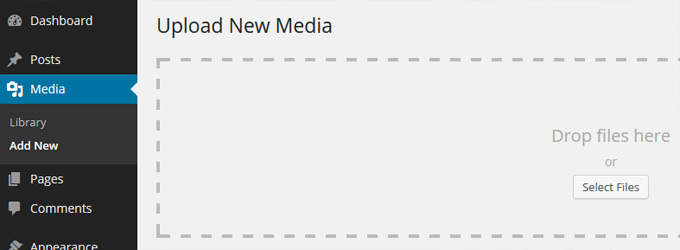
Go to the “Media > Add New” page in your WordPress admin. Drop all your photos on the screen. Once they finished uploading check your “Posts” page and – Bam! – there is a new post for each image you just uploaded.
Adding All The Photos To My Simple Travel Map
To make my life a little more easy I also wanted to add all photos uploaded in the fashion above to my travel map automatically. For that I modified the “Automatic Featured Image Posts” plugin slightly.
I simply added the following code after line 437 of automatic-featured-image-posts.php:
add_post_meta($new_post_id, "location", $new_post_title, 1);
Doing so adds the post title as a “location” custom field to each post. Since for my photos the post title was their location it told my “Simple Travel Map” plugin which location to mark on the map.
That is all there is to do already. It would certainly be possible to modify the “Automatic Featured Image Posts” more, e.g. to also display Exif data inside the photo posts, choose a specific category or set other variables. If you come up with something or have a question feel free to post a comment!
Permalink
Nice post Thomas!
Your article is very quick and easy to follow. Can you please describe me about the SEO of the image site or photo blog?
Thanks for posting! 🙂